The Task Module is designed for admins, agents, support teams, and issuers to manage, coordinate, and organize various tasks effectively. It serves as a central hub for handling document preparation, support cases, tracking communications, and managing authorizations that require involvement from multiple parties.
Tasks can only be assigned to users who are linked or affiliated with one another, ensuring that tasks remain within relevant networks. Tasks cannot be assigned to users with no direct connection, maintaining clarity and streamlined collaboration.
Enabling the Task System for Users #
To enable the task system for a user, a request must be submitted to your system administrator. The following information will be required:
- User name and email address
- Details of any other users who need to be affiliated with the user in point 1.
Task Module Overview #
The Task Overview page provides a comprehensive summary of all your open tasks. From this page, you can efficiently manage and organize tasks using various sub-folders and status filters, making it easier to search for and locate specific tasks.

Task Status & Categories #
Tasks can be assigned a certain status including “OPEN”, “ON HOLD”, “WORKING”, and “CLOSED”. You can filter through the tasks assigned to each status on the left blue panel

Color Coding Tasks #
For enhanced organization, you can also assign color codes to your tasks, providing a visual representation of their current status. This helps you quickly identify and prioritize tasks based on their urgency or progress.
- Hover over a specific task
- Right click on your mouse
- Select one of the color options provided

Task Folders #
Task folders serve as a personal organizational tool, allowing you to manage tasks more efficiently. You can create folders and drag and drop tasks into the corresponding folder in the left-hand panel. Please note that these folders are for personal use only; tasks will be organized into these folders within your account, but will not be applied to folders for other users involved in the same task.
To create a new Folder:
- Click the “+” icon next to the folders panel on the left of the page
- Enter the name of the folder
- Click “add”


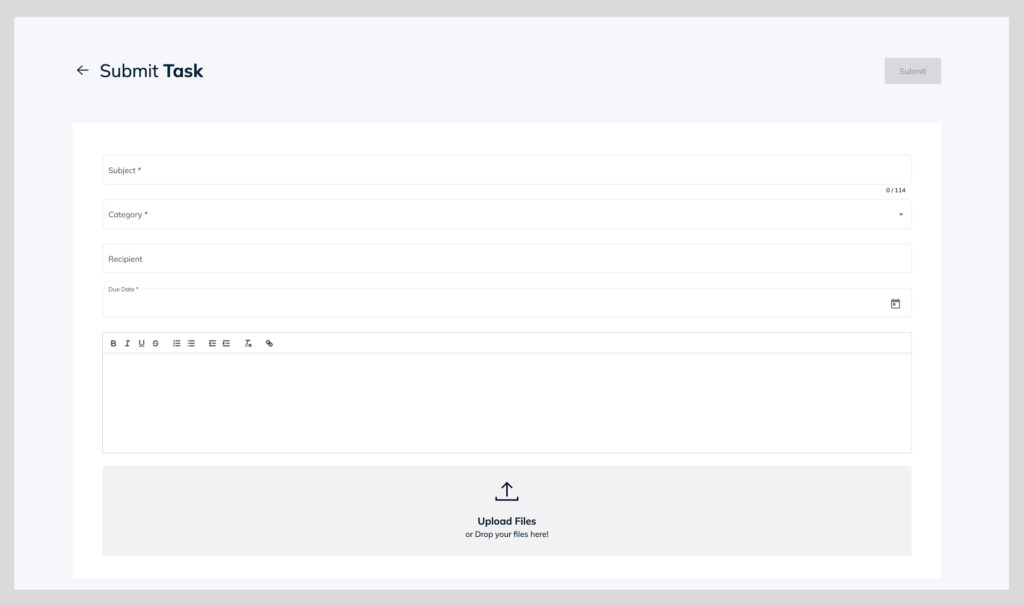
Create a New Task #
- Select “Create a new task” at the top right corner
- Enter all task details
- “Subject” – This is the subject of the task. This should be clearly defined based on the project for easy find later on
- “Category” – Select the category from the dropdown the task is most closely related to
- “Recipient” – Select all recipients who should be included in the task
- “Due Date” – Add a due date to determine when the task should be completed
- “Commenting box” – Add all necessary briefs and informations that the task is about to give all recipients a full understanding of the requirements
- “Upload File” – Upload any supporting documentations related to the task
Tooltip: Use the mention feature to mention specific people the comment is directed to. Do this by typing “@” and select the user the comment is directed to. That user will receive a special notification that they have been mentioned in the task.
Task Detail Page #
From the Task Overview page, click on a task to view the full commenting thread, recent updates, and the history of task communications. Tasks marked with a blue dot indicate a new comment has been added. The following actions can be performed within the task:
- Reply to the latest comments and threads
- Add or remove recipients
- Change the task status to “OPEN,” “WORKING,” “ON HOLD,” or “CLOSED”
- Assign the task “Label” to assign the task to a specific folder
- “Disable Notifications” – if you do not want to receive notifications on that task anymore.
